Integrate Authentication into React Native
This guide shows how to create a simple React application and secure it with authentication powered by Ory. You can use this guide with both Ory Network and self-hosted Ory software.
This guide is perfect for you if:
- You have set up a React Native development environment.
- You want to build an app using React Native.
- You want to enable your users to sign up and sign in to your application.
You can find the code of the sample application here. The application is also available to download from the Apple App Store.
Clone the sample app repository
Start with cloning the repository with the sample application. Run:
# Clone using SSH
git clone git@github.com:ory/kratos-selfservice-ui-react-native.git

# Clone using HTTPS
git clone https://github.com/ory/kratos-selfservice-ui-react-native.git
Prepare environment
To run the sample application, you must set up a React Native development environment and install mobile device emulators:
-
Install Expo CLI.
-
Install Xcode and Xcode Command Line Tools to run the application in an emulated iOS environment.
noteXcode and its iOS emulation are available only on macOS.
-
Install the Android Studio Emulator to run the application in an emulated Android environment.
Run the application locally
Follow these steps to run the app locally in an emulated iOS environment:
-
Enter the directory and install all dependencies:
# Change directory
cd kratos-selfservice-ui-react-native

# Install dependencies
npm i -
Run
npm run iosto start the iOS simulator and run the application.tipYou can also use these commands:
npm startopens a dashboard where you can choose to run the app in iOS or Android simulated environments.npm run androidruns the app in the Android environment.
-
When the simulator starts, the Expo Go application opens on the simulated iOS device. If this doesn't happen, open the app manually.
-
In the Expo Go application, click the + icon in the top-right corner.
-
Enter the project URL provided by Metro:
npm run ios

>@ory/expo-login-registration-template@v0.5.4-alpha.1.pre.5 ios
>expo start --ios

Starting project at /Users/ory/Desktop/kratos-selfservice-ui-react-native
Developer tools running on http://localhost:19002
Starting Metro Bundler

# This is the exact URL you must provide in the simulator. Starts with 'exp://'.
Opening exp://192.168.1.144:19000 on iPhone 13 mini
By default, the application uses the "Playground" project, which is a public demo environment available to all Ory users. When using the application this way, make sure to anonymize any data you send to Ory!
Connect to your project
Instead of using the public playground project, you can connect the application directly to your project and its admin APIs. Follow these steps:
-
Go to Project settings → Overview in the Ory Console, and copy the URL from the API Endpoints field.
-
Open the
app.config.jsfile to configure the application. -
Find the
KRATOS_URLvariable and replace the playground project URL with the SDK URL you copied from your project.app.config.js
Understanding the Implementation
With the application live, running, and connected to your project, let's have a closer look at the code to understand the implementation.
React navigation with authentication session
The entry point for the app is App.tsx. The
component loads fonts, sets up the views, but most importantly, it defines the structure of the application - including the
navigation:
The AuthProvider component
The <AuthProvider> component is the main point of the integration as it adds authentication and login context to the React
Native component tree:
Helper methods
The helper methods in
src/helpers/auth.tsx are simple
wrappers around the Expo SecureStore. To make them work in the web
environment, @react-native-community/async-storage is used as a
fallback:
That's all it takes to make the magic happen! Everything else is handled by the Ory Session Token.
Navigation
With this setup in place, the application can store and refresh the user session. Additionally, this allows the app to verify if the user session is still active in the navigation and shows the dashboard or login/registration screens accordingly:
React Native authentication screens
To avoid writing a form renderer for every component - including styling - the app uses form rendering abstracted into separate
own components, which you can find in
src/components/Form.
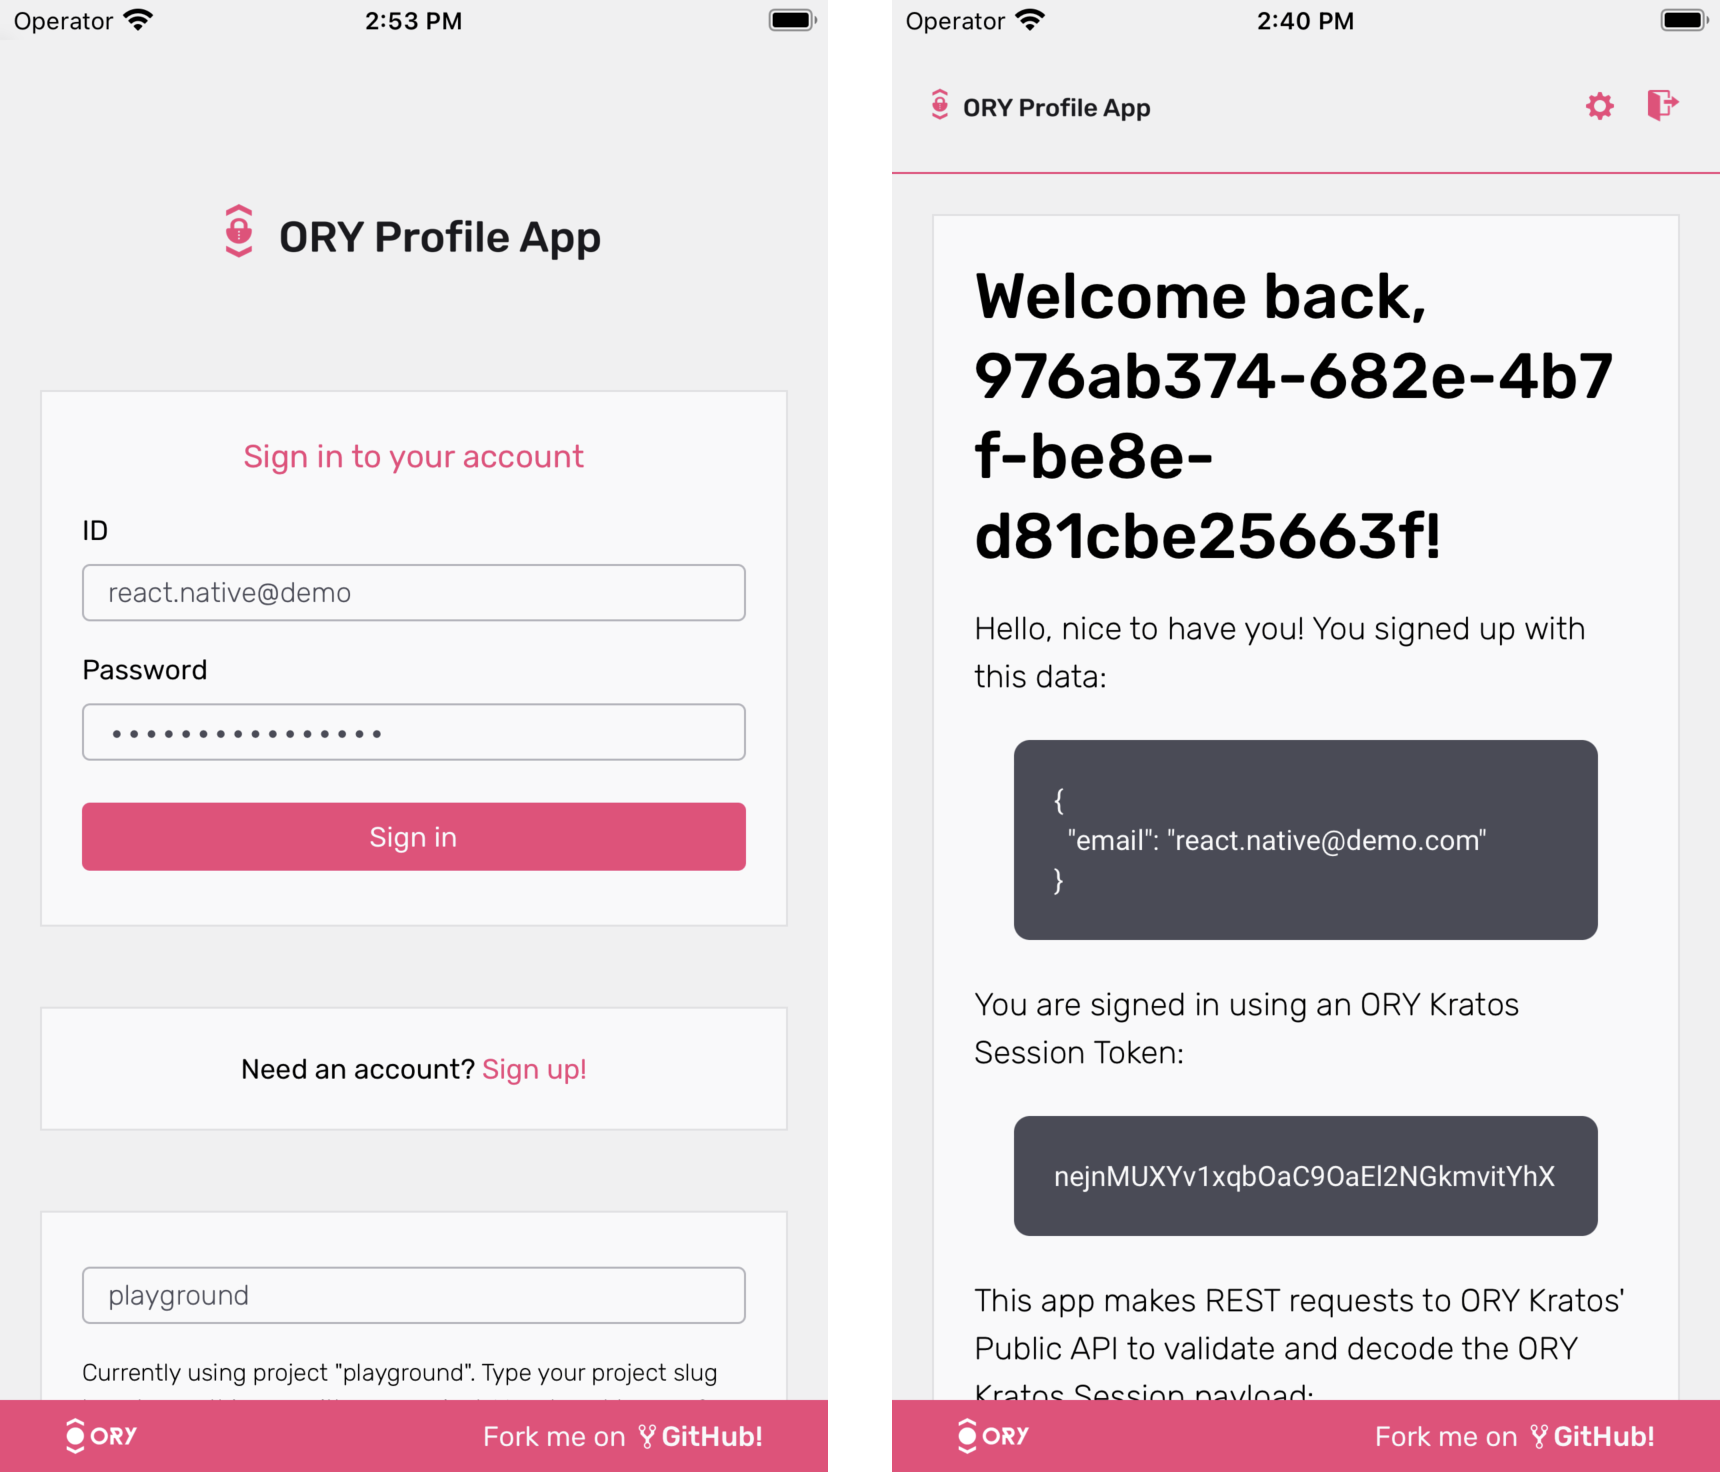
Home component
The Home component receives the user's Session and displays all relevant information.
User settings component
The User Settings component performs a User Settings API Flow.